Publish video in Canvas using Canvas Studio
Did you create a video and would like to make it available to your students in Canvas? Regardless of your tool, follow this “step by step” guide to get your video online.
For a more comprehensive user guide. Visit the Canvas community pages.
Where do I find Canvas Studio?
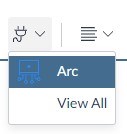
1. Once logged in to Canvas, you should be able to find an icon labeled “Studio” in the menu bar on the left side of your screen:
2. Click the icon and follow the on screen instructions if this is your first time using Canvas Studio
How do I upload my videos?
3. In the top right corner of your screen, you should be able to see three icons
4. Click the one labeled “Legg til” (Add):
5. This should trigger a pop-up on your screen:
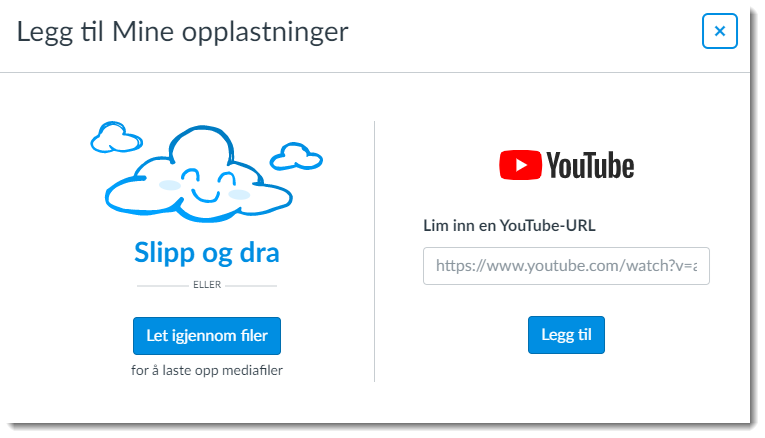
6. You now have two options:
-
- Upload a local file – drag and drop from your file explorer or click the blue button to browse for your file
- Link to a YouTube clip – simply paste the link and click “Legg til” (Add)
7. Click the blue button to look for your file. You should be prompted to locate your file:
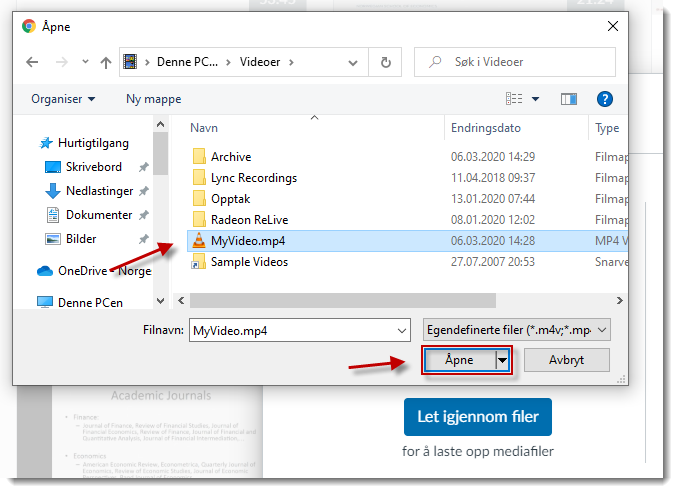
8. Once identified, select the file and click “Open” (Åpne).
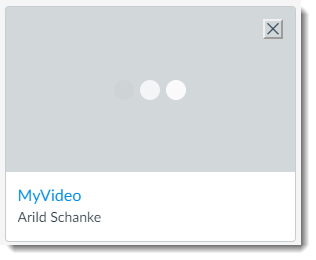
9. Canvas Studio immediately starts processing your file. This could take a while, depending on your file size. A lengthy and/or high resolution video typically is of significant size:
Editing the title and tagging your video
10. When your video has uploaded and processed successfully, we strongly recommend editing the title and adding some information to it. This will help you find your video once your video library has grown larger.
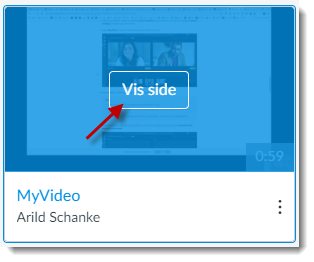
11. Click on the video to start editing:
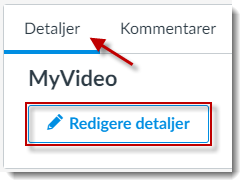
12. Click “Details” (Detaljer), then “Edit details” (Rediger detaljer):
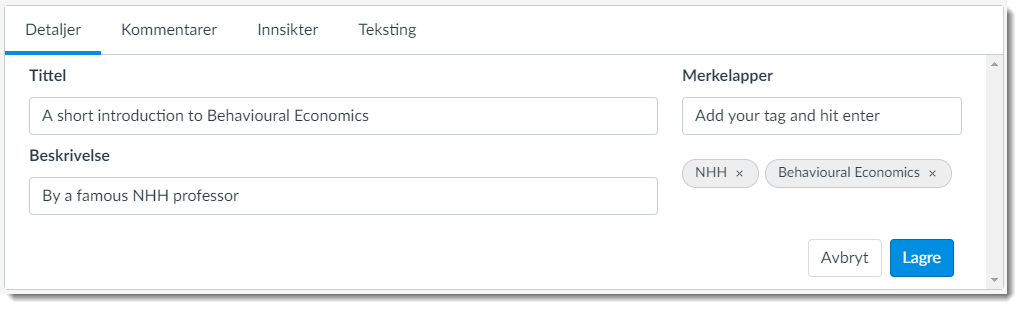
13. Modify your “title” (Tittel), add a “description” (Beskrivelse) and tag your video with “Labels” (Merkelapper). Click “Save” (Lagre) when done. Example:
Adding the video to your Canvas home page
14. Once edited, your video is ready for use. You can include it from all features in Canvas utilizing the rich text editor.
15. For ease of use, we recommend embedding your video to a page. Subsequently, the page containing your video will be addable to your course modules and/or linkable from other pages, announcement, assignments and more.
16. In your course home page, click “Pages”.
17. Add a new page from the top right corner:
18.
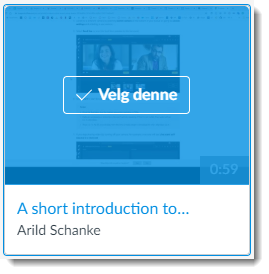
19. Select your video:
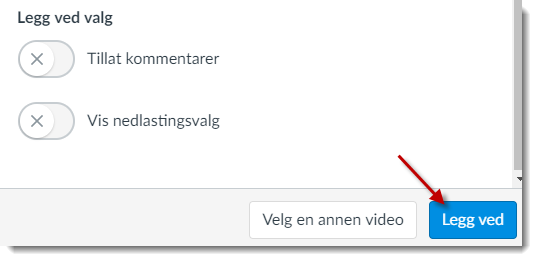
20. Choose your preferences. “Allow comments” (Tillat kommentarer) if you would like your students to be able to add comments to your video. If you simply want them to be able to see the video, leave all options off. Click “Add” (Legg ved) to embed the video in your page:
21. Finally. Save & Publish your page to create a new page with your video embedded:

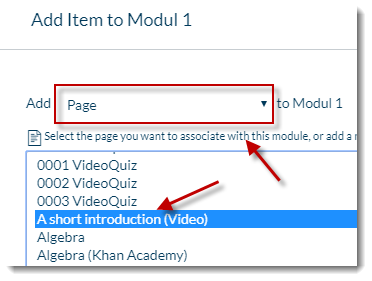
22. Add the video to your modules as you normally would do to add content:
-
- Click the “+” icon (top right)
- Select “Page” from the drop down menu
- Select your newly created page and select “Add item”

File formats
Canvas Studio supports many different file formats. Check the current list
Technical Issues
Are some of the features described here missing from your Canvas setup? Contact: arild.schanke@nhh.no